
Although I'm re-using most all of my Christmas trim here in our new place, something was missing. It's been a little challenging to learn the new flow of this space. But one simple item made the connection: a star. Funny thing, I used my old Papier-mâché stars in the kitchen, and my keepsake star mixed in a basket of pinecones, but the inspiration actually came from Arizona State flag. But I didn't want to just run out, buy some stars and slap them up on trees, wreaths and garland. So I tried something, and it worked! Here's the look (from just simple silver card stock stars from Party City) and here's what I did to get it:

Silver stars from Party City work best for this...
However, if they do not have the silver finish in the size you're needing, buy either white or gold, and spray paint it silver. I too had to do this, but on paper products, it's better to use DESIGN MASTER brand spray paint (also works on Styrofoam).


Using a 120 grade sand paper, LIGHTLY sand the star one way,
then turn slightly to go the other way.
This will make a hatch pattern. NOTE: When sanding, do not go back and forth - it's not a table or chair. Just scratch the foil surface slightly in areas - especially the center.

Mist the silver star lightly with dark bronze spray.
I also tried to spray mist first, and scratch after - both ways work. But again, these work best on the silver stars (must be the make up of the Mylar). I tried it on the gold, but the gold is more delicate and it tore. To age gold, just mist with bronze, and don't scratch.

These were white and gold stars I misted with silver, then misted with the bronze.

Some are with scratches and some are more speckled.
They dry pretty quick, so you can add your personal details to them.

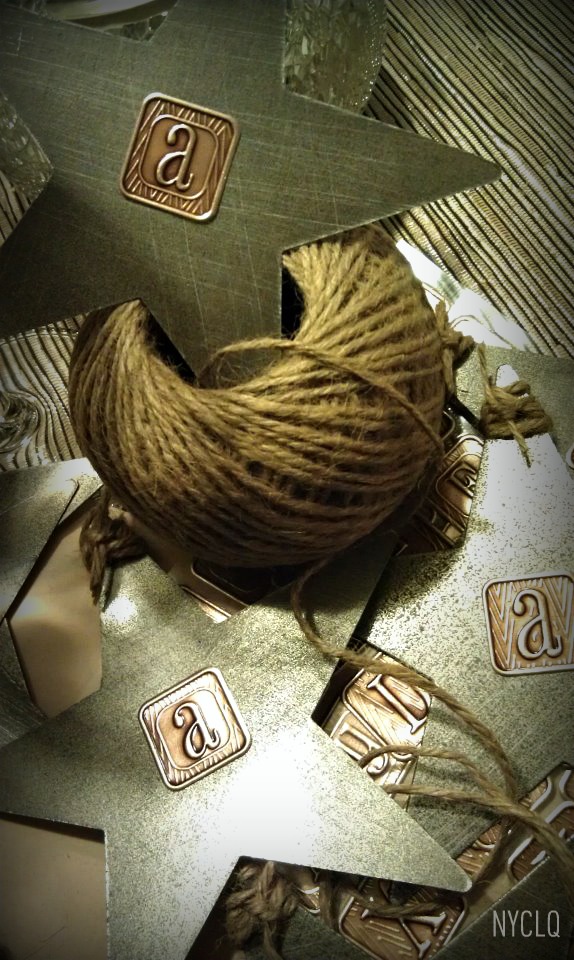
Since I've already been using twine in my decor this year (to adapt a more rustic style to new location),I also used them on the stars.

For all stars, I looped the twine through the hole at the top...

Then just banded the hole by criss crossing 3 times...

For small stars, I knotted and cut off the twine at the top. For the medium and large stars, I used a longer piece of twine, criss-crossed in front, wrapped the legs twice, and tied twine to the back.


For additional details to some of the stars, I used these raised silver & gold pinecone stickers I spotted at Micheal's. I only used these pinecone stars on the center of my wreaths. For smaller stars, I used initial decals, but not our initials and not NYC....

I used the AZs....
But not all stars need to be embellished...

Sometimes less is more, and it gave more interest, especially to the tree, to mix up the looks of the stars. They still all work together because of the finish and twine.
These smaller stars are also great to use for:
Place setting cards or gift tags.

But I LOVE them mixed on to the tree!


By day... or...

by night....


And even though I used the white tree and wreath in our living room, I had also used my green tree (upstairs in the loft) , green wreaths, and green garland - outside (to be posted later - My First Stoop!) and in the stairway...


Garland initials used: (L) Lynda, (J) Jeff, and (S) Sephora , plus a little bit of twine woven through the garland. If I had an outlet here, I would have loved to have done lights!


Under each of the 3 wreaths in the loft windows wreath is a simple candlestick light, all plugged into a remote control plug so they all go on at the same time. It looks pretty from outside - the simple light and silhouette of the wreath.

Soooo simple and so easy to do. I'm sure for some of you bloggers, this is just a thought starter and you can just go to town adding more to it :) They can also be versatile and be used as part of birthday or any Patriotic holiday decor. But for me, these stars were my missing link for a cohesive look and feel to our new home for the holidays (even if we're only renting) ... and I really feel like it embraces the new place where we're at!
What do you think?
In between doing address changes & profile updates online, I'm editing and putting together room pics for a holiday house tour, I'll be posting Monday.
Thanks for stopping by!!

Sharing post at the

ALSO LINKED POST TO:
LOVE IT!Your stars are fabulous and look great on your tree! I used the same large stars to create a Hollywood walk of fame for my daughter's birthday party several years ago. I love your photos, as well!
ReplyDeleteThose stars are great! I can't believe they started as party store stars!
ReplyDeleteI'm so happy that you'r adapting and embracing your new location. The stars are fabulous, they would work great here in Texas (the lone star state) where rustic stars are BIG with people who have a western style decor.
ReplyDeleteThank you so much for the sweet comment on my tree, and I LOVE your faux stars! I love anything that has starts in it, and I'm thinking I will def. have to put this on my list of things to make for next year. So great :)
ReplyDeleteI'm so glad I found you through Thrifty Decor Chick and have joined so I don't miss a single post! Pinning your stars. ~ Maureen
ReplyDeleteVery beautiful your blog many congratulations for your work I leave an embrace of friendship you
ReplyDeleteI praise blog a lot of congratulations for your work and happy friendship navidad:)
ReplyDelete