

Template cut from a simple scarp of a cardboard top.
Other tools & materials needed for the headboard:
Pencil
Utility Knife
Straight Edge / T-Square
Jigsaw
Goggles
Sanding block
Spray Adhesive
Stapler / Staple Gun
Scissors
Gimp
Minimum 4 yds upholstery fabric for a Queen headboard
Foam & Batting
(amount depends on how plush / thick you want your headboard)
Four paint cans - to lift your board up off the ground
Plywood or MDF
4 bolts and eight 1 1/2 inch washers to attach board to bed

After tracing template to board, cut on the outside of the line.
After cuts made, sand the edges a bit to help remove & avoid splinters.

To adhere your foam to the board, spray the foam, adjust and place foam lined up to top and cut along edge. After it's adjusted & cut, lift ends and give another spray to both pieces for better contact.

I used LOCTITE spray adhesive I picked up at Jo Ann's.
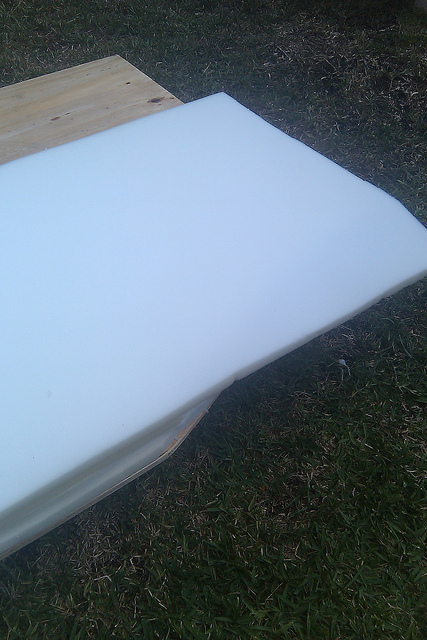
Layer on your foam and cut foam to follow line of the headborad.

Don't fret over perfect cuts - It will all be smoothed out when the batting gets layered in over the foam. Just keep cuts as close as possible to the original template form of the headboard.

Our headboard work surface was nothing more than using four paint cans to keep the board raised off the ground. Afterwards (and just before the rains came!!) we brought the headboard inside, and used the bed itself as the work surface.

Time to cover the stacked foam layers with the batting.
Start stapling from the center and bottom of the layers.
Then flip the board to stand upright, and start pulling batting over
the top and stapling to the back.

After stapling, cut off the excess about an inch & a half.

The headboard was really starting to take shape now!

Since the fabric bolt wasn't the width of the headboard, Jose sewed equal portions of fabric to the left and right. Since the fabric is textured, it hid the seam well.

We lined up the fabric to start stapling - again from the center bottom.

My partner in design crime - Jose Vasquez!
The very bottom of the board (to be behind the mattress and not be seen) will also be covered with fabric. But at the point, the focus was on getting the core just right.

And just because the back doesn't show, that was no excuse to forgo details.
After the fabric wrapped over the top to the back and was stapled on, a simple piece of the fabric was attached to cover the back of the board. The stapled seam is then covered with gimp to hide the seam. Holes were drilled - two on each side of the lower end of the board. Thread bolts and use the 1 1/2 in washers on front and back of board to secure it to the frame. To accent the line even more, we could add a row of studs...

And wah-lah!
A comfy plush headboard to prop up the pretty pillows coming to the bed...

... or give comfort and support while reading in bed.
While Jose sewed the extension pieces to the fabric and stapled the fabric, I started tearing into the two chairs I found for the space, while out thrifting Saturday.

These are the two similar but mis-matched low back lady-like cane chairs,
I pulled together as a "package" with some other goodies
(like a faux bamboo gold frame and six mini chandy shades - all for $30!)
Just call me the Cuban American Picker in Miami!!

Pulled off cording, removed staples, and tore off existing seat back.

Testing the look of the fabric in place to get a 'visual' in my mind.
I'll sand wood and spray gloss ivory for a sleek finish.
This fabric will also be on the bed from pillows I'll use from ones Jose has made.

I have just enough left over foam and batting for new chair backs. To relate the chair to the other furnishings, I'm painting them ivory - but gloss to add a layer of opaque shine. Jose had some leftover chocolate brown damask velvet, which will add an organic layer to the room, and compliment the cut velvet of the headboard. I could have sourced a pink or multi stripe pattern for the chairs, but doing them in ivory & chocolate will give the homeowner the versatility to change out the pink accent color I'm adding in, for other colors like red, green, or blue.

Space Plan for Bedroom Retreat Rescue.

Quick peek at the Drexel Dresser Redo too...
The homeowner said she's had trouble sleeping in the room before because it's been too bright, but it's dark now alright! And that's OK because enough natural light is flooding through the window by day and it's reflecting into the space from the two mirrors placed opposite the window. Plus - all the layers of white & pale pinks to be layered on the bed layered on the new bisque carpet will all help balance the space out.

BEFORE

AFTER

AFTER - but still in progress.
I had Jose add blackout liner to the panels I got from Pottery Barn.
May be hard to see here, but I also asked him to add a chocolate grosgrain band to the interior edges of the store bought panels. Both of the adds helped to customize something that was store bought.

BEFORE
Too bright (and dated) for homeowner.

AFTER
(sorry - bad pic!! but you can still see the silhouette.)
The room is staring to become dark and cozy.

And adding the slight curve to the headboard helps
give a feminine detail to the space.

DIY HEADBOARD INSPIRATION
from Pottery Barn catalog
Ours came to under $105. If I add the nailhead trim, I found a source
online to get 100 for $35.
New carpet was installed the following Friday. Saturday, I unloaded the closets of the
pretty pieces she's had stashed away and got "most" of the room set. While unloading the closets (3 of them), I also did some reorganizing.
To be added: Window panels after they are taken up to skim floor, and with the blackout liner, they'll really darken the space for a good nights rest...


AFTER panels & finishing touches added...
.jpg)
.jpg)
.jpg)
Homeowner is loving it!
What do you think?
Thanks for stopping by!

LINKING POST TO:
Awww Lynda the headboard came out wonderful! I love it! I've made several headboards before (you can see them on my blog) but never with that curve. One of them was inspired by the West Elm. We love that store!
ReplyDeleteYou really saved a ton on making it too vs buying it!! I can't wait to see the finished room.
AprilDenise
What a transformation! It looks so elegant and yet very inviting and feminine.
ReplyDeleteImpressive! I love the transformation!
ReplyDeleteWhat color did you use on the walls? I love it!
ReplyDeleteThank you so much!! The wall color is called FLAX - from Restoration Hardware, but mixed at BM paints.
ReplyDeletexo Lynda
Love this Lynda, fantastic job! The bedding is wonderful. Super choices of rich neutrals and the lamps are perfect!
ReplyDeleteJane the Snob xo