

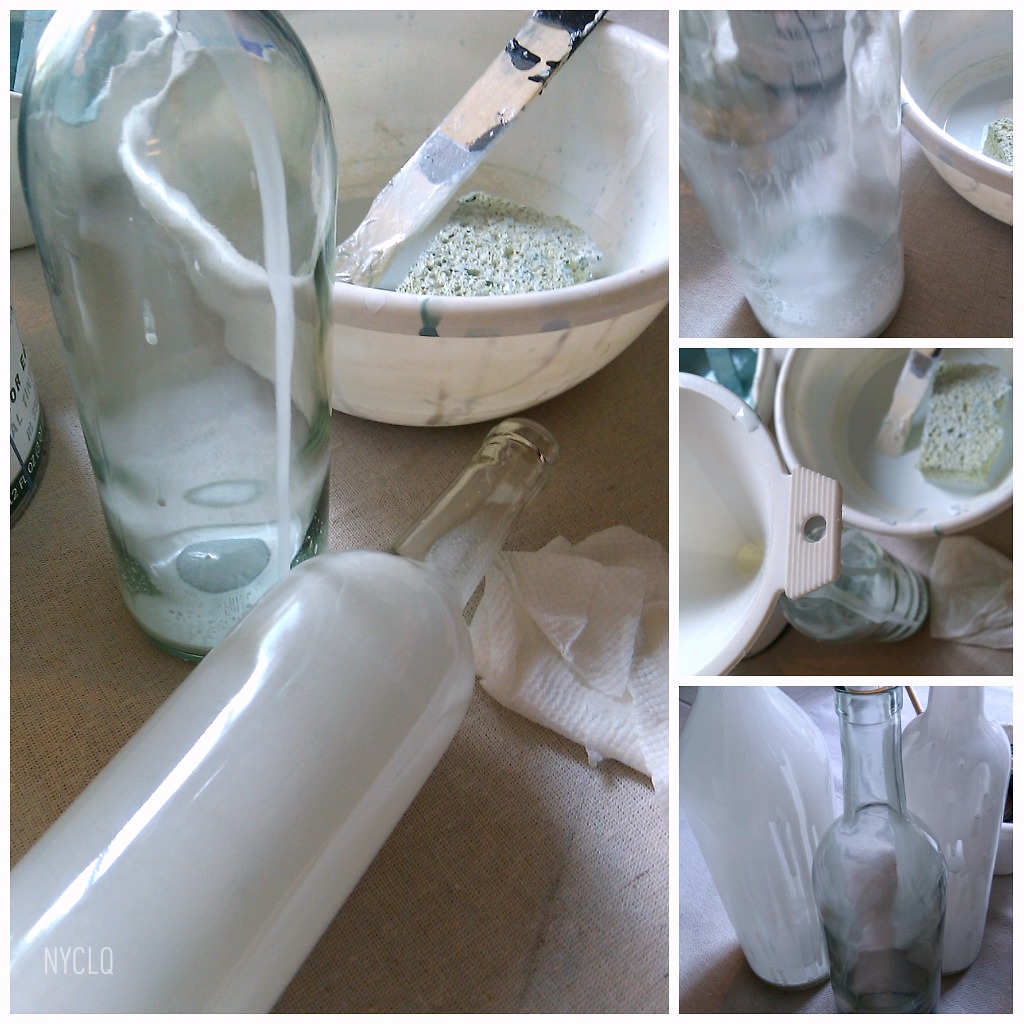
Mixed together about 1 part paint to 3 parts water in a bowl.
And used a sponge to literally "wash" the walls with.

But just using the white over green wasn't ocean blue enough.

To get the blue of the ocean, I did the same mix with last years turquoise.

Although I mostly used white, I'd apply turquoise in some areas, and wash back over it with the white again to tone it down.

I applied the wash in a circular motion, starting at the top (because yes - it drips) right corner, worked my way down, and up and over by sections. Doing a circular motion helped to blend the paints and the sections.

One layer wasn't enough - it was still too green.
After the first layer dried, I went back and repeated the process.

Top left corner original green still peeking out before applying the white wash.

Even though I used a sponge, this isn't the "sponge" faux painting of the 90's. That was more dabbing paint on to give a flat wall texture. Since all our walls already are textured, doing the wash enhanced it as a feature.

After the second layer, it was starting to get more of the wash I was looking for.

Adding in the turquoise really helped.
I could have just painted it - but it would have been too opaque.
I wanted to also sense the foam of the wave break on the shore...

I really enjoy experimenting with these looks in our home.
After this process, and the clean up, I also tried something different in the dining room...

But thankfully, I did this "test" on the outside before tearing it apart.
And it's a good thing, because I stood back, looked at it and said, "I don't like it."
But hey, that's what experiments are for - to try things out.

Something else I tried in the space was adding back in more green.
I did this with two paisley print tablecloths from HomeGoods - I simply hung from clip rings (like I did last year with my post: How to Paint A Black Door + A No Sew Panels Project)

And since I had also "tried" the dining table coming out from the wall, rather than parallel to it, I had some space to create a little window nook with the bench...

But I wasn't feelin' the green, so I put back the printed white linen panels.
They just felt more airy...

And like a rubber band...

I snapped and put the table back parallel to the wall.
I prefer this look for everyday, but turning the table would work better to give more seating space for guests. So the experimenting wasn't a total loss.

How often do you experiment with different looks or paint techniques in your home? Have you ever? It's a great way to refresh a space - and if you're trying a wash, you probably already have the paint and a sponge, so it could be a $0 makeover in an afternoon.
And with the left-over white & turquoise washed paints, you can

Why not try it this weekend?!

LINKING POST TO:
I loved the apple green, but the wash is just as beautiful, and so perfect for summer. I have the same addiction for change. I have painted, faux, retextured my walls so many times, it's like changing an outfit for me. I have a similar blue green wash in my living room that took me about seven layers to achieve that I love. But I'm getting the itch to repaint it. I always love your style, keep the projects coming!
ReplyDeleteThanks Shannon!! I greatly appreciate your comment and enthusiasm!! Thanks for stopping by xo
ReplyDelete:D Lynda
your dining room looks like a resort now - very chic and cool and tropical. Nice work! I'm intrigued by your slipcovered bench - it's a good look :) Thank you for dropping by and leaving a comment, you are so kind and I so appreciate it. Take care ~Diane
ReplyDeleteYou're so creative. The wash is a great look. Not so sure I'm comfortable with trying it but the new look is gorgeous.
ReplyDelete~ Monique
I liked the lime green but I LOVE this! The whole room has an airy, beach feel to me. I am a creature of change too so really appreciate your sharing.
ReplyDeleteHave a wonderful weekend!
Pat
love the turquoise. just decided to do my lr and dr in turquoise. I have red velvet dr chairs and a sagey green sofa. Want a more modern feel. What do you think?
ReplyDeleteWow, this is EXACTLY what I was looking for when I tried to look for whitewashing instructions! Looks great, thank you!
ReplyDeletethank you, this helped so much!
ReplyDeleteYou are amazing, I tried your idea on my home walls and walls looks like a new painted wall. Thanks for sharing the beneficial idea with us.
ReplyDelete