Showing posts with label white wash. Show all posts

DIY: HOW TO GRAY WASH WALLS

After packing up and putting away the summer seashells & details, I wanted to start to neutralize our home for Fall. One of the ways I do that is for the spaces to be void of any accent color. With that said, the white washed / turquoise dining room wall needed to go! And in one afternoon - away it went. I cleared the space in front of the wall, put down my drop cloths - on the floor and the table - and brought in the paint colors I had in the garage.  I used the existing colors we already have on our walls: Lamp Room Gray, Cinderblock, and Crosby (a dark brown.) I didn't want any of the whitewashed turquoise to show through, so first I painted the wall with the lightest grey (Lamp Room) which is also the color on the other walls in the dining room and entrance.


Bye-Bye Summer!


After the base coat of grey was applied, I started to mix my "paint concoctions" (as someone commented and made me smile). The mix was only applying water to the colors I poured into my mixing bowls.


This one was a little bit messier than the white wash walls, so I did use gloves. I didn't have enough sponges, so I cut the ones I did have in half (and they were easier to hold anyways). For mixing the paint with the water, I used a chip brush and sponge stick. When I applied the was to the walls this time though... I pulled a Bromstad: I used a water spritzer on the wall sprayed over the section I had just painted. Doing this made blending SO MUCH easier....


One afternoon with color and it really changed the mood from Summer to Fall.


 Although the wall color was already making a difference, something still felt like it was missing from the space.


The room was missing layers.
Layers of textiles, like a rug and heavier window panels. And this was when I decided to just "go for" the Gallery Wall
(click italicized/bold words to read about how I made the No Template Gallery Wall )


I did have the collection of thrifted art sitting in the dining room for a week after
painting the dining room wall.


And it was after I did the wall and pulled back the furniture, I brought back in the old sisal & black chenille rug. I had removed the rugs last Winter to go with a lighter look. Now the old rug looks new again...

Summer to Fall Transition

I set the chairs a little different in the space too. Although I did still use the Drop Cloth Bench Slip Cover (made earlier this year) I only used 3 of the slip covered dining chairs, running along the back. It works better with the length of the table since I still kept the leaf in it to make it larger. The 3 chairs repeat the 3 frosted glass light fixtures - which I now removed the basket weave sleeve from.


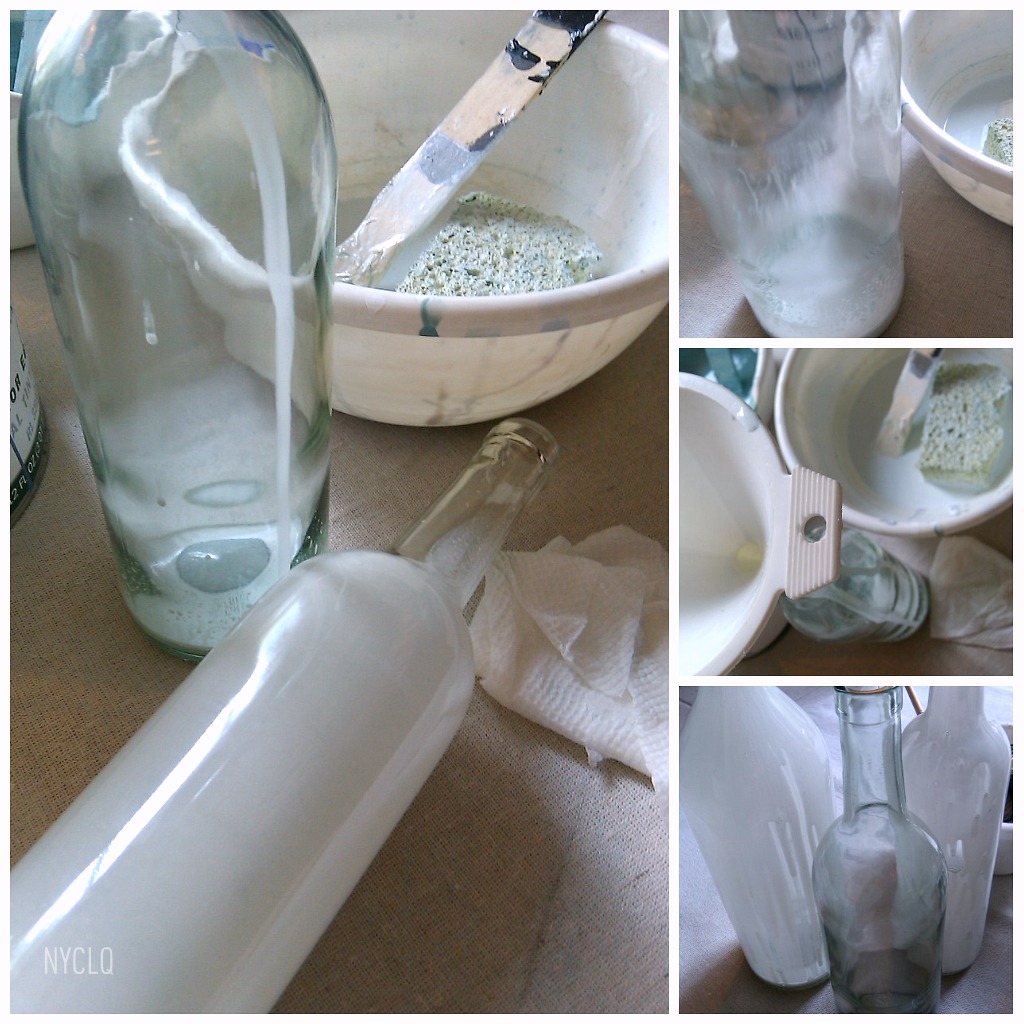
After removing the shell necklaces and starfish from the Beachy Bottles (previously on the buffet in the living room) I brought them into the dining room... and appropriately filled the basket with my wine cork collection ;)


The branch in the corner I found on the side of the road last year, and had used it on the buffet for Fall. I love the way the bottles just look old now. Maybe I'll try some twine around their necks for texture.


Re-using the colors we have in our home helped give the space a cohesive look. The rustic wall finish layered with the woods, prints and textures in the space really helped make it feel more cozy for Fall... and it was all from just a simple shift of accessories and re-using some left over paint stored in the garage. What extra paint do you have just sitting in the garage? Why not try a new finish for an accent wall for Fall?

Thanks for stopping by and
have a great weekend!
(Hopefully a SAFE and DRY one away from Hurricane Irene.)


LINKING POST TO:


DIY: HOW TO WHITE WASH WALLS

Call me crazy, but not long after I had painted the dining room with a VERY vibrant apple green in Spring, I was looking for a change. It's probably because I had gotten so incredibly inspired by the gorgeous blue waters of Hollywood beach, I wanted to try to recreate its look at home. Another inspiration had come from seeing the sun washed colors of the buildings Key Largo. Before doing the large wall, I did a test spot and lived with it for a few days. I decided I liked it, so one afternoon, I pulled everything back, threw down the drop cloths, got out my paints, mixing bowls, sponges and a cookie sheet and went to town! It was a messy process... but I love the end result.

Mixed together about 1 part paint to 3 parts water in a bowl.
And used a sponge to literally "wash" the walls with.

But just using the white over green wasn't ocean blue enough.

To get the blue of the ocean, I did the same mix with last years turquoise.

Although I mostly used white, I'd apply turquoise in some areas, and wash back over it with the white again to tone it down.

I applied the wash in a circular motion, starting at the top (because yes - it drips) right corner, worked my way down, and up and over by sections. Doing a circular motion helped to blend the paints and the sections.

One layer wasn't enough - it was still too green.
After the first layer dried, I went back and repeated the process.

Top left corner original green still peeking out before applying the white wash.

Even though I used a sponge, this isn't the "sponge" faux painting of the 90's. That was more dabbing paint on to give a flat wall texture. Since all our walls already are textured, doing the wash enhanced it as a feature.

After the second layer, it was starting to get more of the wash I was looking for.

Adding in the turquoise really helped.
I could have just painted it - but it would have been too opaque.
I wanted to also sense the foam of the wave break on the shore...

I really enjoy experimenting with these looks in our home.
After this process, and the clean up, I also tried something different in the dining room...


But thankfully, I did this "test" on the outside before tearing it apart.
And it's a good thing, because I stood back, looked at it and said, "I don't like it."
But hey, that's what experiments are for - to try things out.


Something else I tried in the space was adding back in more green.
I did this with two paisley print tablecloths from HomeGoods - I simply hung from clip rings (like I did last year with my post: How to Paint A Black Door + A No Sew Panels Project)


And since I had also "tried" the dining table coming out from the wall, rather than parallel to it, I had some space to create a little window nook with the bench...


But I wasn't feelin' the green, so I put back the printed white linen panels.
They just felt more airy...

And like a rubber band...


I snapped and put the table back parallel to the wall.
I prefer this look for everyday, but turning the table would work better to give more seating space for guests. So the experimenting wasn't a total loss.


How often do you experiment with different looks or paint techniques in your home? Have you ever? It's a great way to refresh a space - and if you're trying a wash, you probably already have the paint and a sponge, so it could be a $0 makeover in an afternoon.
  
And with the left-over white & turquoise washed paints, you can


Why not try it this weekend?!


LINKING POST TO:


LinkWithin

Related Posts with Thumbnails